Lesson 25
Excel VBA Lesson 25: Creating Animation in Excel VBA
Continue learning classic Excel VBA with the same shared lesson template and cleaner visual style.
Classic Excel VBA
Shared modern template
Ad-free lesson layout
Learn how to bring your Excel worksheets to life with simple animation techniques
25.1 Introduction to Excel VBA Animation
While Excel VBA is primarily used for data processing and automation, it also offers capabilities for creating simple animations and interactive elements. These techniques can be useful for:
- Creating engaging presentations
- Building simple games or simulations
- Visualizing processes or workflows
- Adding interactive elements to dashboards
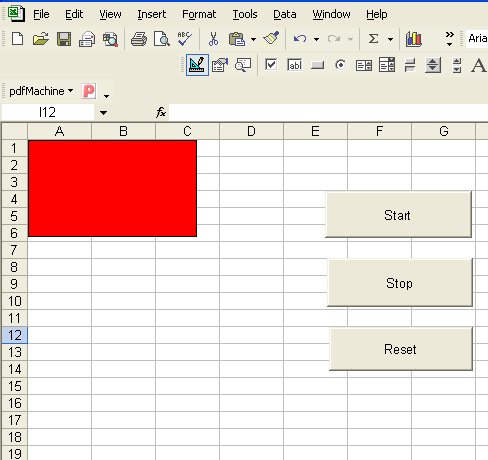
25.2 Basic Horizontal Movement
This example shows how to make an image move horizontally across the worksheet:
The code:
Private Sub StartButton_Click()
 repeat:
With VBAProject.Sheet1.Image1
 .Left = .Left + 1  ' Move 1 pixel to the right
 DoEvents           ' Allow other processes to run
 If .Left > 200 Then .Left = 1 ' Reset position when reaching edge
End With
GoTo repeat
End Sub
Key Concepts:
- .Left property: Controls the horizontal position of the object
- DoEvents: Crucial for smooth animation - allows Excel to process other events
- Infinite loop: The GoTo statement creates continuous movement
25.3 Vertical Movement Example
To make an object move vertically, modify the code to use the Top property instead:
Private Sub StartButton_Click()
repeat:
With VBAProject.Sheet1.Image1
 .Top = .Top + 1    ' Move 1 pixel down
 DoEvents
 If .Top > 200 Then ' Check if reached bottom
  .Top = 1          ' Reset to top
 End If
End With
GoTo repeat
End Sub
25.4 Diagonal Movement
Combine both properties for diagonal movement:
Private Sub StartButton_Click()
repeat:
 With VBAProject.Sheet1.Image1
 .Top = .Top + 5    ' Move down
 .Left = .Left + 5  ' Move right
 DoEvents
 If .Top > 200 Then .Top = 1
 If .Left > 200 Then .Left = 1
 End With
 GoTo repeat
End Sub
25.5 Advanced Animation Techniques
1. Bouncing Animation
Create a more natural bouncing effect with direction changes:
Private Sub StartButton_Click()
 Dim xSpeed As Integer, ySpeed As Integer
 xSpeed = 2: ySpeed = 2 ' Initial movement speed

 Do While True
  With VBAProject.Sheet1.Image1
   .Left = .Left + xSpeed
   .Top = .Top + ySpeed

   ' Reverse direction when hitting edges
   If .Left <= 0 Or .Left >= 300 Then xSpeed = -xSpeed
   If .Top <= 0 Or .Top >= 200 Then ySpeed = -ySpeed
  End With
  DoEvents
 Loop
End Sub
2. Controlled Animation with Stop Button
Add a stop button for better control:
' Module level variable
Public stopAnimation As Boolean

Private Sub StartButton_Click()
 stopAnimation = False
 Do While Not stopAnimation
  With VBAProject.Sheet1.Image1
   .Left = .Left + 1
   If .Left > 200 Then .Left = 1
  End With
  DoEvents
 Loop
End Sub

Private Sub StopButton_Click()
 stopAnimation = True
End Sub
25.6 Best Practices for VBA Animation
- Use DoEvents: Always include DoEvents in animation loops to prevent Excel from freezing
- Limit animation scope: Keep animations simple to maintain performance
- Add controls: Include start/stop buttons for better user experience
- Consider alternatives: For complex animations, consider exporting to PowerPoint or using other tools
Summary: Key Points About Excel VBA Animation
✅ In This Lesson, You Learned:
- Excel VBA can create simple animations using object position properties (Left, Top)
- The DoEvents statement is essential for smooth animation
- Basic movement includes horizontal, vertical, and diagonal patterns
- More advanced techniques include bouncing effects and controlled animation
- Animations can enhance presentations but should be used judiciously
- Always provide controls to start/stop animations for better user experience
🔗 Related Resources