Excel VBA Lesson 17: Excel VBA Objects - The Complete Guide
Continue learning classic Excel VBA with the same shared lesson template and cleaner visual style.
17.1: Understanding Excel VBA Objects
Objects are fundamental building blocks in Excel VBA programming. While VBA isn't a pure object-oriented language, it heavily utilizes object-oriented concepts to interact with Excel components.
What is an Excel VBA Object?
An Excel VBA object represents an element of Excel that you can control programmatically. Each object has:
- Properties: Characteristics or attributes (like color, size, value)
- Methods: Actions the object can perform (like copy, delete, sort)
- Events: Triggers that can execute code (like clicking a button)
Common Excel VBA Objects:
- Application: The Excel application itself
- Workbook: An Excel file
- Worksheet: A single sheet in a workbook
- Range: A cell or group of cells
- Chart: A data visualization
- Shape: Objects like buttons, text boxes, etc.
To view VBA objects in Excel:
- Press ALT+F11 to open the VBA Editor
- Press F2 or click View > Object Browser
- Explore the hierarchical structure of objects
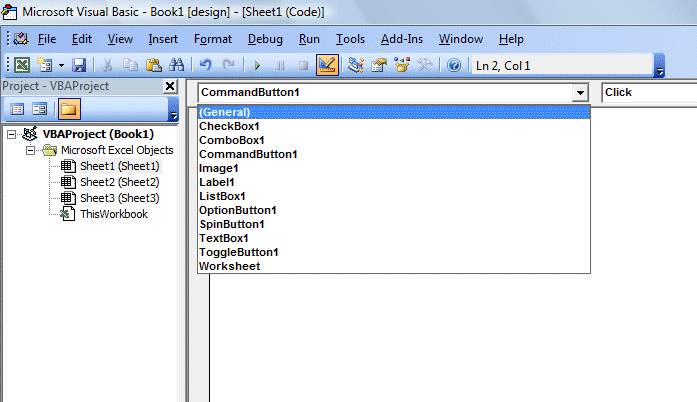
The Object Browser (Figure 17.2) provides a comprehensive view of all available objects, their properties, methods, and events:

17.2: Working with Object Properties
Properties define the characteristics of an object. You access properties using dot notation (object.property).
Example 17.1: Setting Cell Values
Private Sub CommandButton1_Click()
    Range("A1:A6").Value = 10
End Sub
This code sets the value of cells A1 through A6 to 10. The Value property is the default property for Range objects, so it can be omitted:
Example 17.2: Simplified Syntax
Private Sub CommandButton1_Click()
    Range("A1:A6") = 10
End Sub
Object Hierarchy in Action
Objects exist in a hierarchy, where some objects are properties of other objects. For example:
Cellsis a property of theRangeobjectInterioris a property of theRangeobjectColoris a property of theInteriorobject
This hierarchy allows for precise control:
Range("A1:A3").Cells(1,1).Interior.Color = vbYellow
This statement fills only cell A1 (the first cell in the specified range) with yellow color, demonstrating how properties can refine the scope of your actions.
Example 17.3: Formatting Text
Private Sub FormatText()
    ' Change font properties for a range
    Range("B2:D5").Font.Name = "Calibri"
    Range("B2:D5").Font.Size = 12
    Range("B2:D5").Font.Bold = True
    Range("B2:D5").Font.Color = RGB(0, 0, 255) ' Blue color

    ' Center align the text
    Range("B2:D5").HorizontalAlignment = xlCenter
End Sub
Example 17.4: Working with Multiple Properties
Private Sub FormatWorksheet()
    ' Set multiple properties for the active sheet
    With ActiveSheet
        .Name = "Sales Data"
        .Tab.Color = RGB(255, 0, 0) ' Red tab
        .PageSetup.Orientation = xlLandscape
        .PageSetup.CenterHorizontally = True
    End With

    ' Format a table range
    With Range("A1:F20")
        .Borders(xlEdgeBottom).LineStyle = xlContinuous
        .Borders(xlEdgeBottom).Weight = xlThick
        .Interior.Color = RGB(220, 230, 241) ' Light blue
    End With
End Sub
17.3: Practical Applications of VBA Objects
Understanding objects is crucial for automating Excel tasks. Here are some practical examples:
Example 17.5: Creating a Summary Sheet
Private Sub CreateSummary()
    ' Add a new worksheet
    Dim summarySheet As Worksheet
    Set summarySheet = ThisWorkbook.Worksheets.Add
    summarySheet.Name = "Summary"

    ' Copy data from other sheets
    Worksheets("Sales").Range("A1:D10").Copy summarySheet.Range("A1")
    Worksheets("Expenses").Range("A1:D10").Copy summarySheet.Range("E1")

    ' Format the summary sheet
    With summarySheet
        .Range("A1:H1").Font.Bold = True
        .Range("A1:H1").Interior.Color = RGB(191, 191, 191) ' Gray
        .Columns.AutoFit
    End With
End Sub
Example 17.6: Dynamic Chart Creation
Private Sub CreateDynamicChart()
    Dim chartObj As ChartObject
    Dim dataRange As Range

    ' Define data range
    Set dataRange = Worksheets("Data").Range("A1:B10")

    ' Add chart to the worksheet
    Set chartObj = Worksheets("Dashboard").ChartObjects.Add(Left:=100, Width:=375, Top:=50, Height:=225)

    ' Configure chart properties
    With chartObj.Chart
        .ChartType = xlColumnClustered
        .SetSourceData Source:=dataRange
        .HasTitle = True
        .ChartTitle.Text = "Monthly Sales Report"
        .Axes(xlCategory).HasTitle = True
        .Axes(xlCategory).AxisTitle.Text = "Months"
    End With
End Sub
17.4: Best Practices for Working with Objects
- Use the With statement to work with multiple properties of the same object efficiently
- Qualify your objects (e.g.,
ThisWorkbook.Worksheets("Sheet1")instead of justWorksheets("Sheet1")) - Release object references by setting them to
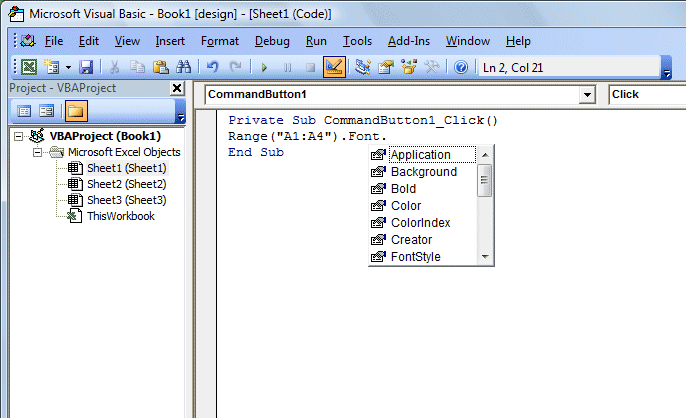
Nothingwhen done - Use IntelliSense (Figure 17.3) to discover available properties and methods
- Error handling is crucial when working with objects that might not exist
17.5: Common Object-Related Errors and Solutions
| Error | Cause | Solution |
|---|---|---|
| Object required | Referencing an object that doesn't exist | Check object names and hierarchy |
| Method or data member not found | Incorrect property/method name | Use IntelliSense to verify correct names |
| Object variable not set | Using an object without Set keyword | Always use Set when assigning objects |
| Subscript out of range | Referencing non-existent collection item | Verify collection indexes/names |
Summary: Key Points About Excel VBA Objects
- ✅ Objects are the building blocks of Excel VBA programming
- ✅ Every object has properties (attributes) and methods (actions)
- ✅ Objects exist in a hierarchy (Application → Workbook → Worksheet → Range)
- ✅ Use dot notation to access properties and methods (Object.Property)
- ✅ The Object Browser (F2) helps explore available objects
- ✅ IntelliSense provides auto-completion for objects and their members
- ✅ The With statement makes working with multiple properties efficient
- ✅ Always qualify object references to avoid unexpected results
Mastering Excel VBA objects is essential for creating powerful macros and automating complex tasks. Practice with the examples provided to solidify your understanding.
🔗 Related Resources