<<Lesson 12>> [Contents] <<Lesson 14>>
In lesson 4, we have learned how to handle codes in Excel VBA that involve decision-making process through the use the conditional statement If….Then….Else. However, for multiple options or selections programs, the If…Then…Else structure could become too bulky and difficult to debug if problems arise. Fortunately, Excel VBA provides another way to handle complex multiple-choice cases, that is, the Select Case…..End Select decision structure. The syntax of a Select Case…End Select structure is as follows:
Select Case variable
Case value 1
Statement
Case value 2
Statement
.
.
Case Else
End Select
We shall demonstrate the use of Select Case…End Select in the following examples:
Example 13.1
In this program, we want to automatically assign a remark in relation to a certain examination grade. For example, if the grade is A, we shall assign remark as High distinction, A- for distinction and so forth. To enter the code, start MS Excel then place a button and a label onto the spreadsheet. The label is for displaying the remark. Cells(1,1) is for the user to enter the grade.
The code:
Private Sub CommandButton1_Click()
Dim grade As String
grade = Cells(1, 1)
Select Case grade
Case “A”
label1.Caption = “High Distinction”
Case “A-“
label1.Caption = “Distinction”
Case “B”
label1.Caption = “Credit”
Case “C”
label1.Caption = “Pass”
Case Else
label1.Caption = “Fail”
End Select
End Sub
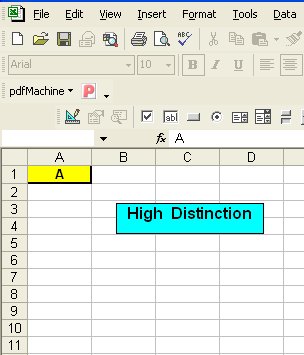
The Output
Figure 13.1
Example 13.2
In this example, we shall show you how to process the grades of students according to the marks given. For example, if a student’s mark is 85, the corresponding grade is A and if the mark is 20 the grade will be F and so forth.
The code
Private Sub CommandButton1_Click()
Dim mark As Single
Dim grade As String
mark = Cells(1, 1).Value
‘To set the alignment to center
Range(“A1:B1”).Select
With Selection
.HorizontalAlignment = xlCenter
End With
Select Case mark
Case 0 To 20
grade = “F”
Cells(1, 2) = grade
Case 20 To 29
grade = “E”
Cells(1, 2) = grade
Case 30 To 39
grade = “D”
Cells(1, 2) = grade
Case 40 To 59
grade = “C”
Cells(1, 2) = grade
Case 60 To 79
grade = “B”
Cells(1, 2) = grade
Case 80 To 100
grade = “A”
Cells(1, 2) = grade
Case Else
grade = “Error!”
Cells(1, 2) = grade
End Select
End Sub
Explanation:
To set the cell align alignment to center, we use the following procedure:
Range(“A1:B1”).Select
With Selection
.HorizontalAlignment = xlCenter
End With
We can use the statement case value1 to value 2 to specify the range of values that fulfil the particular case.
You should also include the error case where the values entered are out of the range or invalid. For example, if the examination mark is from 0 to 100, then any value out of this range is invalid. In this program, I use case else to handle the error entries.
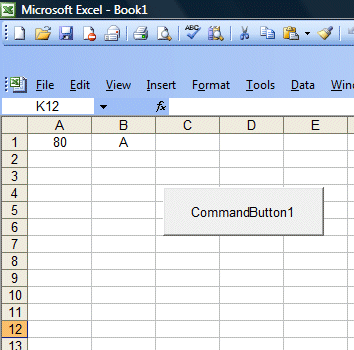
Figure 13.2 illustrates the output of this example.

Figure 13.2


