[Lesson 22]<<[Table of Contents]>>[Lesson 24]
We have learned how to work with check boxes, option buttons, and text boxes in Excel 2010 VBA in the previous lessons. We shall continue to learn how to manipulate other controls in Excel VBA 2010 in this lesson. In this lesson, we will deal with List Box, Combo Box, and Toggle Button.
23.1 List Box
The function of the List Box is to present a list of items where the user can click and select the items from the list. To add items to the list, we can use the AddItem method.
To clear all the items in the List Box, you can use the Clear method. The usage of Additem method and the Clear method is shown Example 23.1.
Example 23.1
Private Sub CommandButton1_Click()
 For x = 1 To 10
  ListBox1.AddItem “Apple”
 Next
End Sub

Private Sub CommandButton2_Click()
 For x = 1 To 10
  ListBox1.Clear
 Next
End Sub
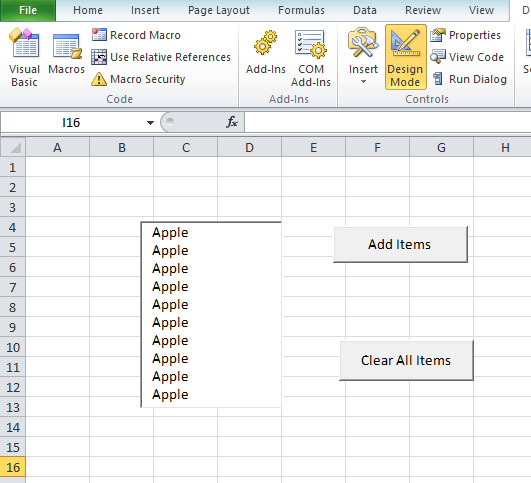
Figure 23.1
23.2 Combo Box
The function of the Combo Box is also to present a list of items where the user can click and select the items from the list. However, the user needs to click on the small arrowhead on the right of the combo box to see the items which are presented in a drop-down list. In order to add items to the list, you can also use the AddItem method.
Example 23.2
Private Sub CommandButton1_Click()
 ComboBox1.Text = “Apple”
 For x = 1 To 10
  ComboBox1.AddItem “Apple”
 Next
End Sub

Private Sub CommandButton2_Click()
ComboBox1.Clear
 End Sub
The Output

Figure 23.2
23.3 Toggle Button
Toggle button lets the user switches from one action to another alternatively. When the Toggle button is being depressed, the value is true and when it is not depressed, the value is false. By using the If and Else code structure, we can thus switch from one action to another by pressing the toggle button repeatedly.
Example 23.3
In this example, the user can toggle between apple and orange as well as font colors.
Private Sub ToggleButton1_Click ()
If ToggleButton1.Value = True Then
 Cells (1, 1) = “Apple”
 Cells (1, 1).Font.Color = vbRed
Else
 Cells (1, 1) = “Orange”
 Cells (1, 1).Font.Color = vbBlue
End If
End Sub
View the animated image in Figure 23.3
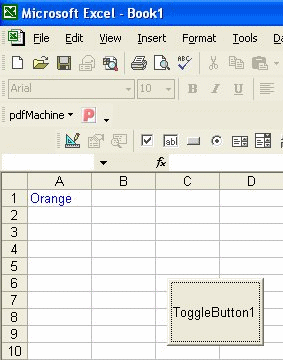
Figure 23.3